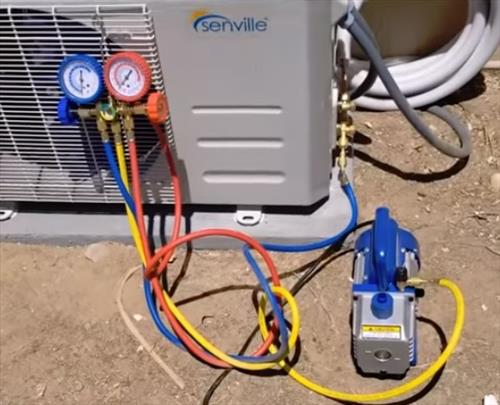
A video is at the bottom of the page for a visual walk-through if needed.
Vacuuming down a mini split system is necessary before releasing the refrigerant.
It also is one way a unit can be tested for leaks.
The process is not difficult and easy enough for a DIYer with the right tools.
Tools Needed to Vacuum Down a Mini Split
- Vacuum Pump
- HVAC Gauges
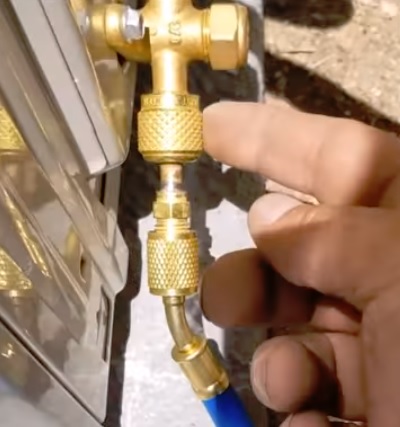
- Mini Split Adapter 5/16 to 1/4 Coupler
- Allen Keys
HVAC gauges and a vacuum pump are needed to set a mini split into a vacuum.
Alternatively, a micron gauge can be used in place of HVAC gauges and do the same thing.
A vacuum pump simply evacuates all the air from the system placing it in a vacuum.
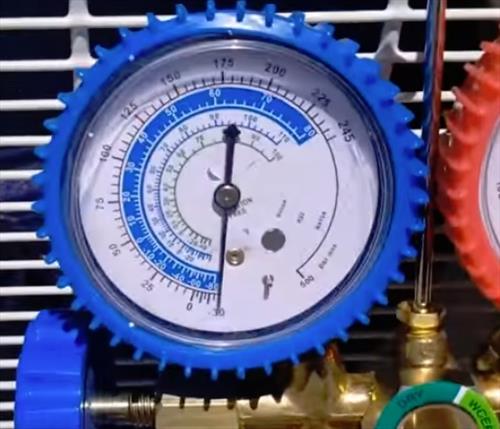
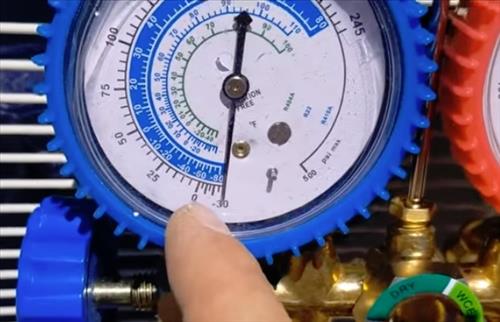
The gauge will show the pressure, which will go negative as the air is pumped out.
There are many low-cost units that work well enough for anyone who only uses them occasionally.
Most mini split units will also need an adapter to connect to the low-pressure port.
Example Budget Vacuum Pump on Amazon
ZENY 3,5CFM Single-Stage 5 Pa Rotary Vane Economy Vacuum Pump 3 CFM 1/4HP Air Conditioner Refrigerant HVAC Air Tool R410a 1/4″ Flare Inlet Port, Blue
Example Budget 410a Manifold Gauges on Amazon
ZENY Diagnostic A/C Manifold Gauge Set R134a Refrigeration Kit Brass Auto Serivice Kit 4FT w/Case, 1/4″ SAE Fittings
Mini Split Adapter 5/16 to 1/4 Coupler On Amazon
Mini Split Adapter, R410a Adapter 5/16″ Female Quick Couplers x 1/4″ Male Flare
Basic Overview of How HVAC Gauges Work
Manifold gauges are a necessary tool in HVAC and are easy to use once they are understood.
Here is the basics of how gauges work when pumping down a mini split system.
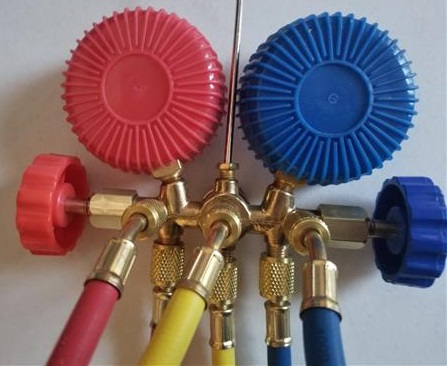
Manifold Gauge Hose Color Codes and Connections.
- The Blue hose connects to the low-pressure line on an HVAC system such as a mini split.
- The Red hose connects to the high-pressure line and will not be used during a mini split install.
- The center Yellow hose connects to a vacuum pump when pumping a mini split down.
The pressure gauges will read any pressures once connected.
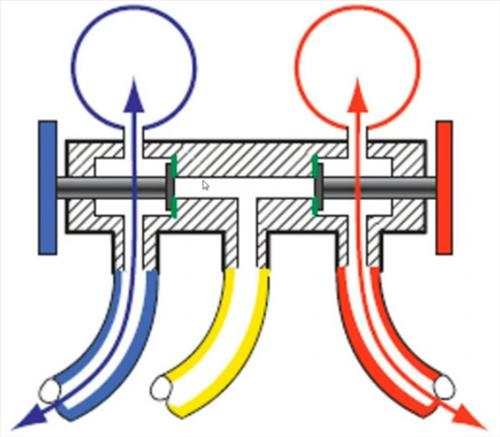
The two side valves turn open or off, which will direct the flow to the center hose.
A clockwise turn shuts a valve off. Counter-clockwise turns a valve open.
The two side valves should usually be off unless in use.
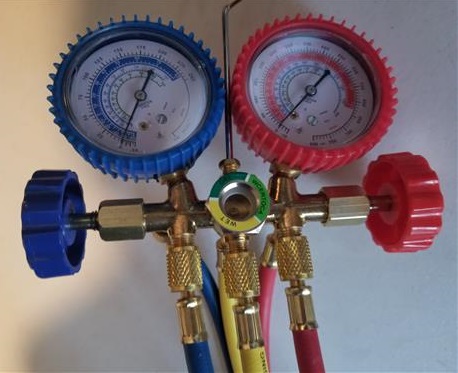
When pumping down a mini split the red valve will always be shut, and the blue valve will only open once the vacuum pump starts working.
It is usually best to shut the blue valve off before turning the vacuum pump off.
The hose ports on the back go to nothing and are to keep dirt out of the hoses when not in use.
Steps To Vacuum Down a Mini Split
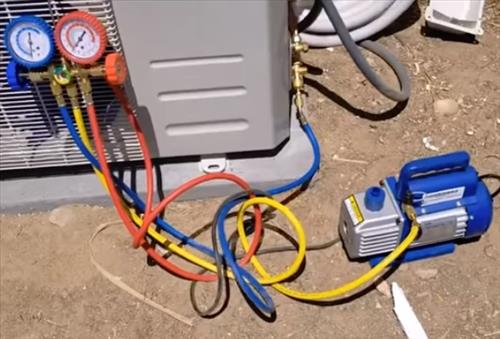
- Be sure both High (Red) and Low (Blue) valves are shut Off at the gauges.
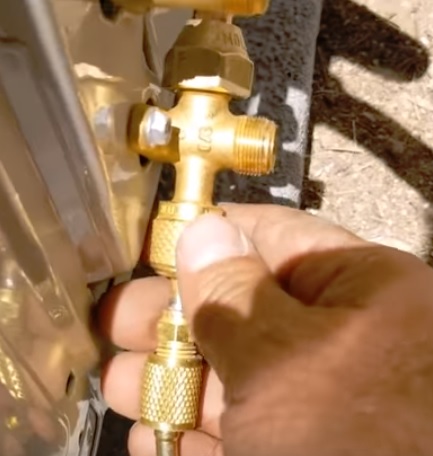
- Hook the HVAC Gauges Blue hose to Low-Pressure Port on the outside condensing unit. (Usually the only port on the unit.)
- Hook Center Yellow Hose to the Vacuum Pump.
- Turn On the vacuum pump and open the valve on the HVAC Gauges Low Pressure Side (Blue).
- Let the pump run until the system goes into a Vacuum, negative pressure.
- Let the pump run for at least 20-30 minutes or more, turn the gauge Blue valve shut, and then turn the vacuum pump off.
- Let the unit sit for some time 20-30 minutes or more and be sure the vacuum holds.
- If the unit holds the vacuum there are no leaks, and refrigerant can be released into the system.
- If the unit does not hold a vacuum there is a leak that will need to be fixed and the unit pumped down again.
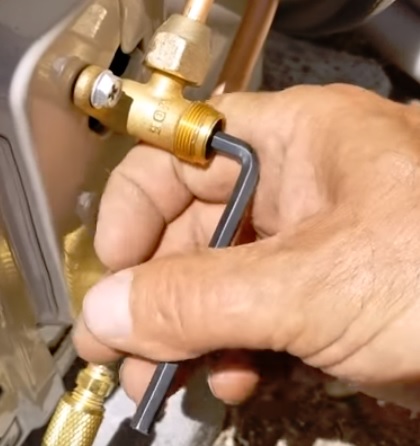
- Using an Allen Key, let the refrigerant into the system. Open both the high and low-pressure valves on the outside condenser. Open them all the way out, which will take several turns.
- Remove the Low-Pressure Blue Hose from the unit as quickly as possible. A small amount of refrigerant will come out, which will be minimal. This is necessary so as not to break the vacuum.
Summary
Vacuuming down a mini split and releasing the refrigerant is not difficult and falls into the DIY category.
Of course, if in doubt, be sure to call a professional.
There are some mini split systems that come set in a vacuum and do not require using gauges, such as Mr Cool Mini Split Kit.
Most units will require the system to be pumped down into a vacuum.
The vacuum process starts at roughly minute 10:50 in this video.
Hi there, I’m wondering about the vacuum procedure for a 2 zone mini split.
I think each of the zones has separate coolant systems that don’t interact with each other?
So you would vacuum each of them separately but when do you release the refrigerant?
Do you 1) vacuum one line and release the refrigerant for that line and then vacuum the second line and release the refrigerant for the second line; or, 2) vacuum both lines first and then release refrigerant for both zones at the same time?
Exactly what I need to ask, which way did you choose to do it in the end?
There should be a larger main valve on the higher part of above all the other valves that releases the refrigerant into all other valves. You can open all valves except main and draw a vacuum on the main to do all at the same time.
where’s this video mentioned at the beginning
Using this blue compound gauge which barely has about 1/4″ range between 0 and -30 inch Hg is not accurate to know if the vacuum is at 500 micron Hg as required by most mini split systems. Even the gauge shows -30, it could actually at 2000 micron! No body know.
Must use a high resolution digital gauge for this job.
So what did they use before digital gauges where introduced? Analog compound gauges worked well for many years and still do.
I would recommend the Testo 575 model digital guages if to go digital, go with the a good set. Black Max analog guages by CPS are a nice set if you prefer analog.
vacuum is nor like that because it is the absences of atmospheric pressure the mose you can get is absolute vacuum.
0 micron is absolute vacuum
I vacuumed it down for 20 minuets it held perfectly. so I shut the low side valve off and turned pump off . It lost pressure. Do I have a leak because it holds pressure until I shut the valve off. It don’t make since ,Why would hold pressure with and valve on?
The vacuum needs to hold when the pump is turned off or there is a leak.
Where is the reducer – 5/16to1/4 for the pump best found?, i.e. lowes, plumbing, or?
I can not get my system to take a vacuum. What is the best way to find the leak?
Pressurize the system with Nitrogen, and spray all of the connections (and solder joints, if you done did that) with soapy water. Don’t exceed the max system pressure.
If I cut down the line set on a Mr. cool 24k to under 9 feet I only needed about 5-6 feet. How much refrigerant should I pull out or will it be okay not to worry and work ok with the shorter line set? thanks so much
What is the procedure if the vacuum doesn’t hold?
Find and fix the leak and vacuum the unit down again.
1.Can you make a show on how to install ceiling or cassette type ac? Does it comes with a pump to expell water to the outside. Show us in detail also on how to make a vacuum on the system…
2.The 2 zone mini split wall type ,does it have 2 highs and 2 lows pipe connectors outside the system? To make a vacuum check, is that the same steps as a single zone split ac.
Thank you.
How would I go vacuuming a 17kw add on cooler. Would I need to do anything different. Do I need to put nitrogen in. Or add refrigerant if it’s only 12m?
Please reply to my email as well if possible
Much appreciated.
I’m using a 4 way manifold what’s the instructions for it concerning the mini split units
The instructions are the same only use the left 2 hoses and low pressure gauge. One hose goes to the vacuum pump and the other hose the low pressure port. The right gauge and hoses are not used.
While vacuuming a new system: does the low side (thicker pipe) valve need to be closed before vacuuming. I know the high side need to be closed.
It needs to be open on the side connected which is usually the low-side (the other side closed). Connect the hoses, start the pump, open the valve, let it pump down 10-20 minutes, close the valve, turn off the pump.
Spoddy’s answer could easily be misunderstood. The valves with the Allen key need to both be closed “all the way in CW” when vacuuming, and a micron gauge should always be used never just your gauge set. I take the red hose off and attach the micron gauge there so you have a easy chance to separate the micron gauge from the system. And instead of opening both Allen key valves after appropriate vacuum is achieved, you close your valves on your test manifold then you just crack the Allen key valve on the smaller pipe for a couple seconds. That’ll replace your vacuum with positive pressure by introducing refrigerant from the condenser. You can see this on your blue gauge, just a bit above zero is enough. Then remove your blue hose and adapter from the unit. Then fully open both Allen key valves fully and they have to be fully open and opened hard against the stop. Just as hard as it was to get it to start turning from the closed position. The valves are double seated meaning they are only completely sealed from the outside if they are fully seated open
Richard, dammn good explaining! Thank you!
Will unit still function properly if lines are not vacuumed?
It will not work properly as the oxygen contaminates the refrigerants.
Would be nice to have more info re the gauges. Which ones are closed/open and when do you open/close them. What is the purpose of the red hose? Is the red valve closed or open? And what is the purpose of the yellow hose and is the yellow gauge open or closed. Very, very confusing to a beginner.
There’s a reason “people” I.E. me pay 20 grand to learn HVAC in school. There’s a right way, where your equipment lasts a really long time, and then there’s a thousand wrong ways where your system will work but it’s not going to last, and warranty sure isn’t going to cover it. If you aren’t comfortable it’s worth paying someone who is qualified. It’s not right science by no means but there’s a damn good reason we charge 100 bucks an hour.
most of us cant afford your 100 bucks an hour jerk
Installing a Mini-Split, no. but-
It is a science, all its own. Very interesting one too, imo
I enjoyed the years I spent working HVAC and chillers,
learned a lot and passed on everything I could.
Excellent instructions, based on your experience would the Zeny pump, recommended in this article, be adequate to vacuum a split system central AC with 30 feet line set down to 500 Micron?
Thanks,
Go to an autopart store and borrow a vacuum pump for free.
As a DIY person- if after vacuuming – and using a negative pressure gauge (Yellow Jacket 49138) and negative pressure holds- can I skip the Nitro challenge?
If by “Nitro challenge”, you mean pressure testing the lines with Nitrogen (which also purges the lines of moisture), the Nitrogen pressurization is done before you evacuate the lines via vacuum. If you fed pressurized (or atmospheric) nitrogen (or any gas) into the lines while they are being pulled down with vacuum, you would lose some or all of your vacuum, as the nitrogen entered the lines. I skipped nitrogen purging my lines, as I reused lines already in place (which were fine?), but mostly because I didn’t have a 3/8F to 1/4M flare fitting/adapter to connect my Nitrogen tank to my vacuum manifold.
Hello,
I would like to know about the unscrewing allen key on high.and low side port…
Is there a stopper for the screw??
If you keep unscrewing can it pop out ?
Thank you
On the 3 different units I’ve installed, no, the pressure valve (allen head) screws will stop after many turns, and not come out. As you are opening the valve (turning the allen wrench CCW), it will keep turning until it stops (full wrench resistance), indicating the value is fully open.
When you are pulling a vaccume do you need to pull the valve stem out on the low side
There is a stop when the Allen key is all the way open. The valve stem does not need to be removed and is only done for a faster pump down.